
We recently had the opportunity to model a heat exchanger in Nodi and actually print it.
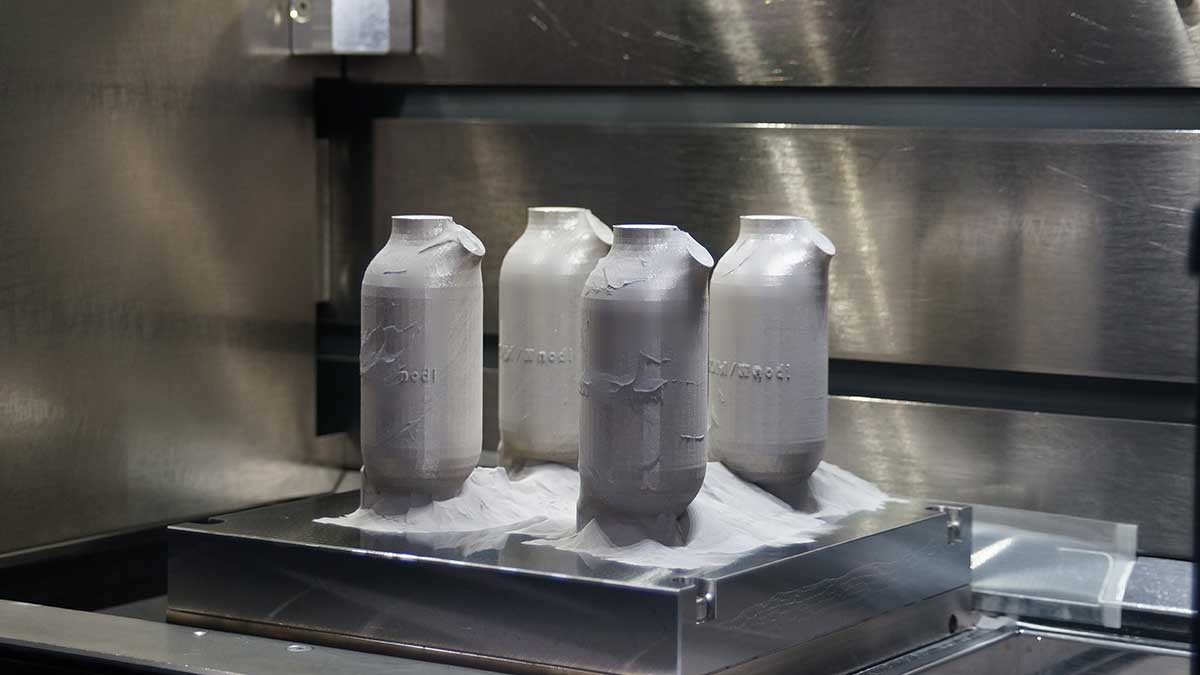
In this article, we share what we learned along the way.
Modeling the Base Shape
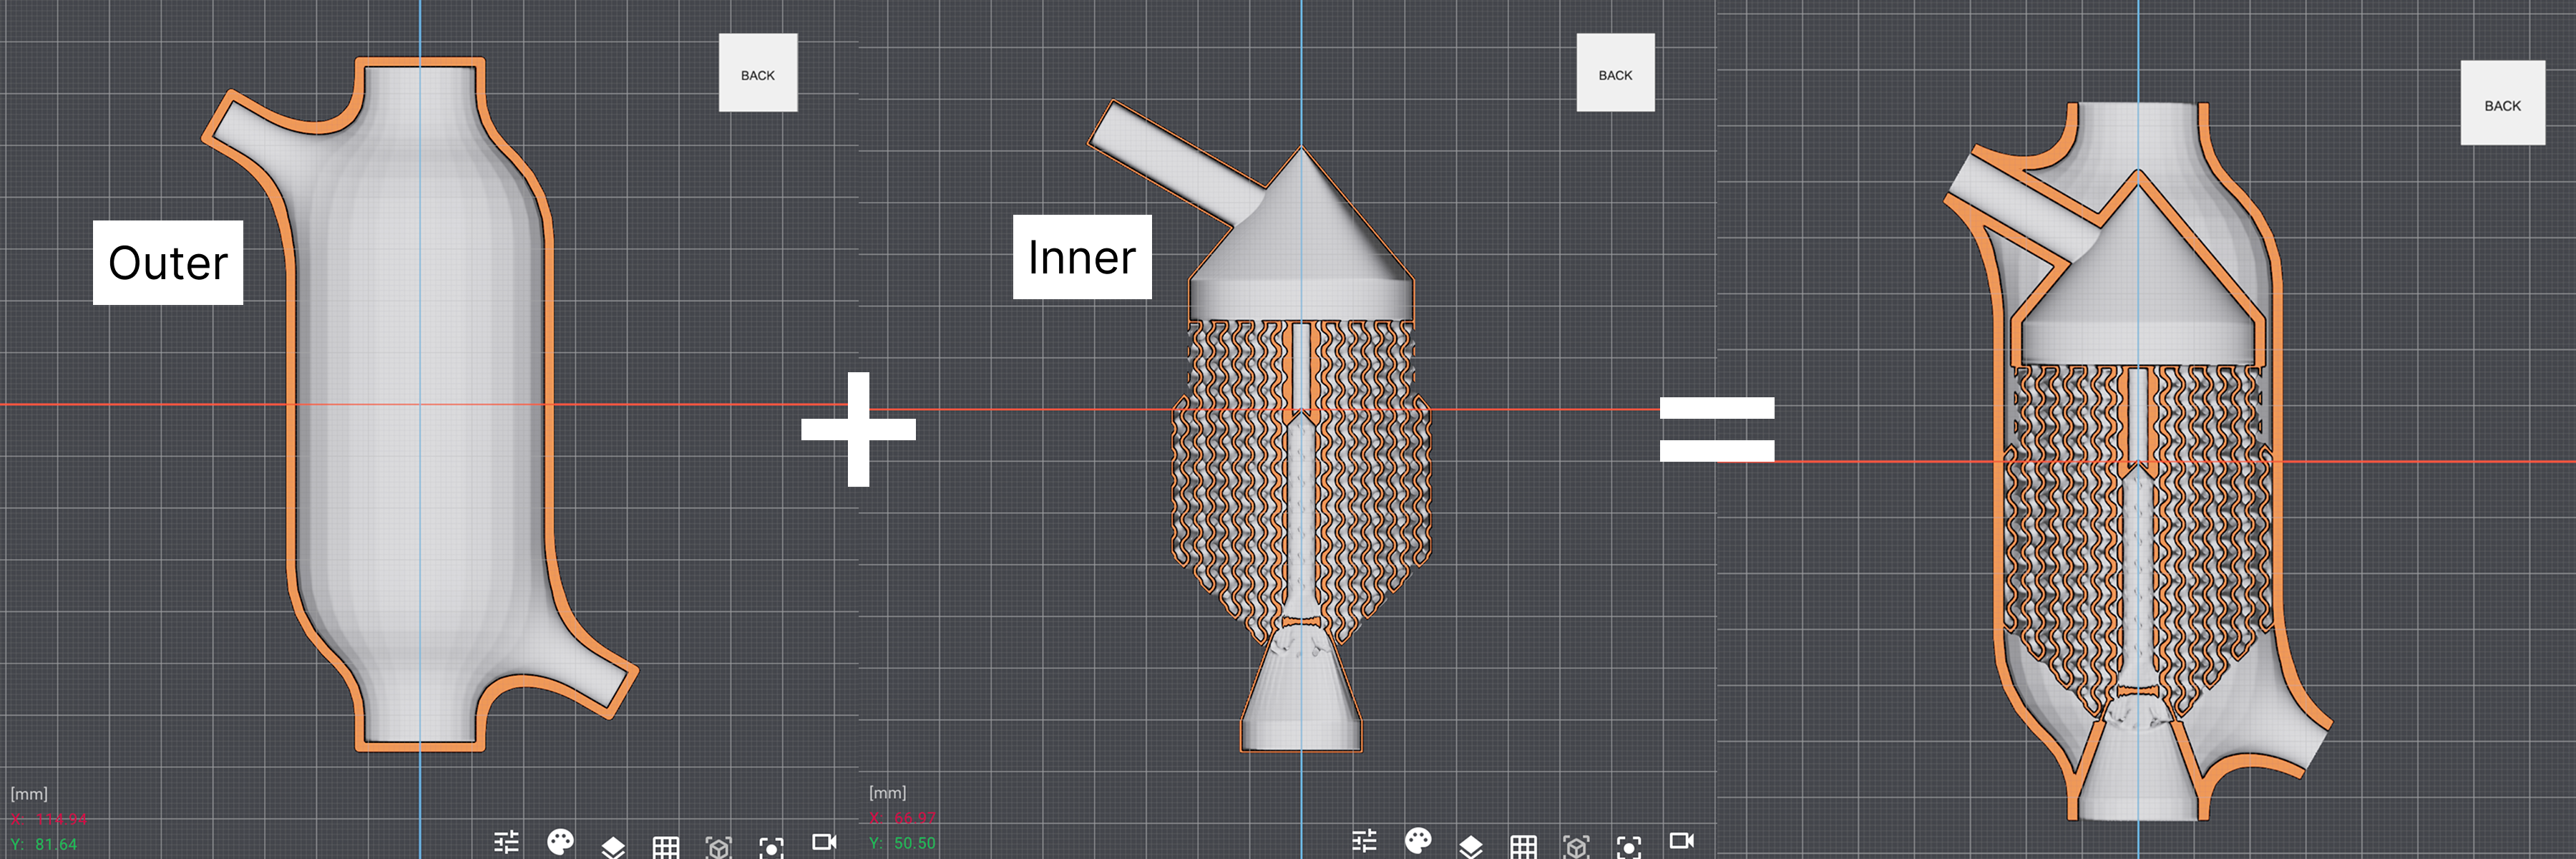
We modeled the outer shape (Outer) and the inner shape (Inner) separately, then combined them to build the whole part. The outer shape covers the shell and the inlet/outlet pipes, while the inner shape covers the flow path, including the gyroid heat exchange section.
Checking Overhangs
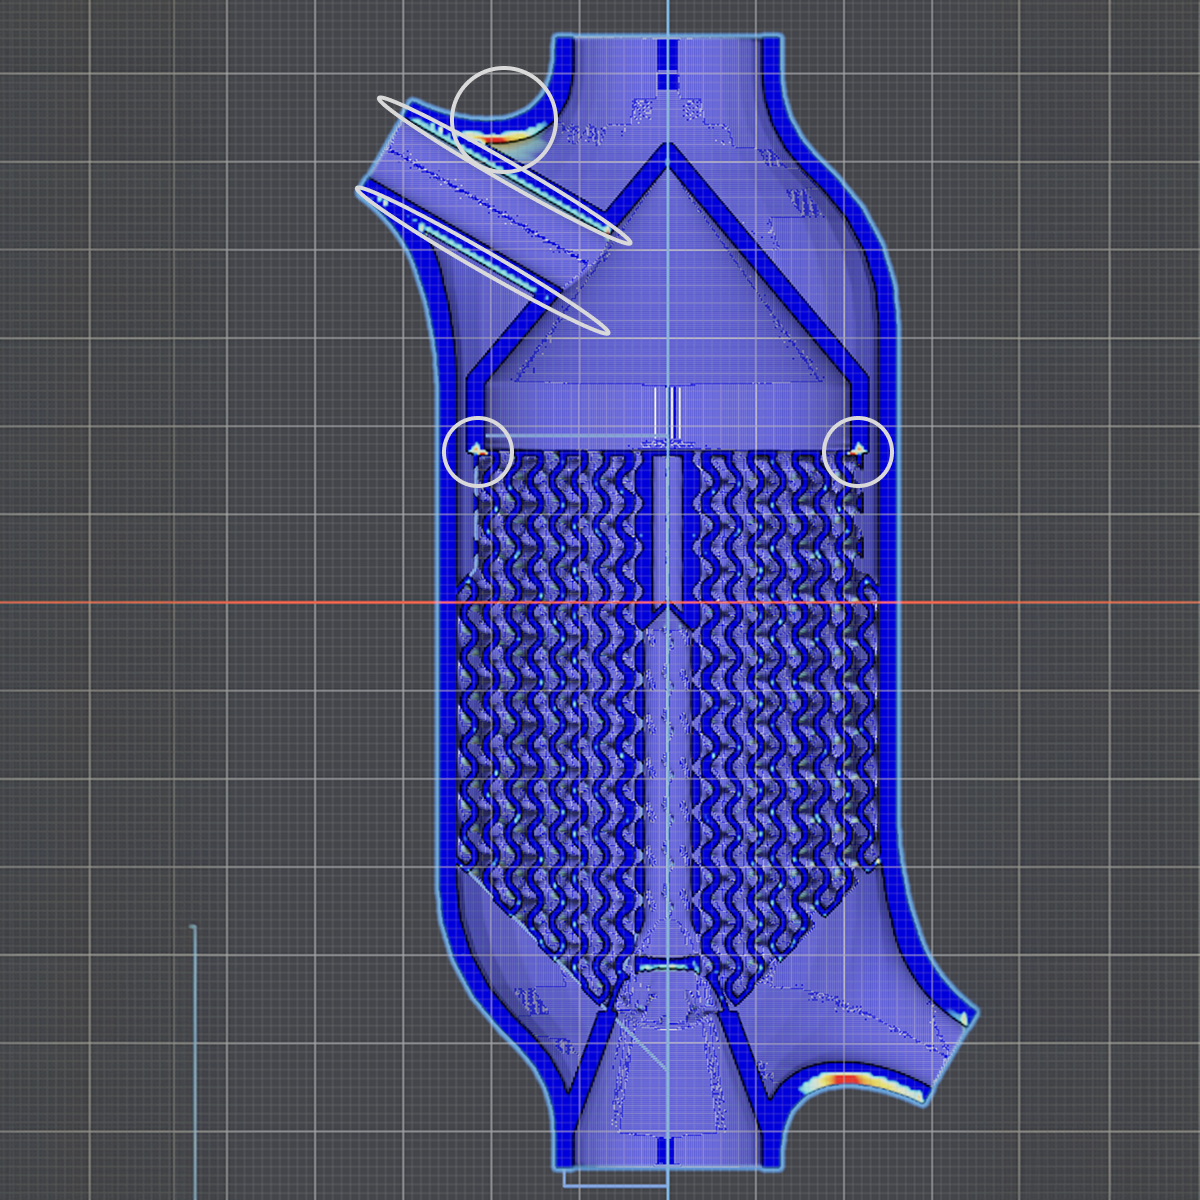
Once the shape is ready, we check for overhangs with the Overhang node. Areas shown in red have large overhangs, and we found problems in places such as the inlet pipe and where the gyroid meets the ceiling.
Endless Overhang Fixes
Just when you think you’re done, new issues keep popping up one after another.
Making the Inlet a Teardrop Shape
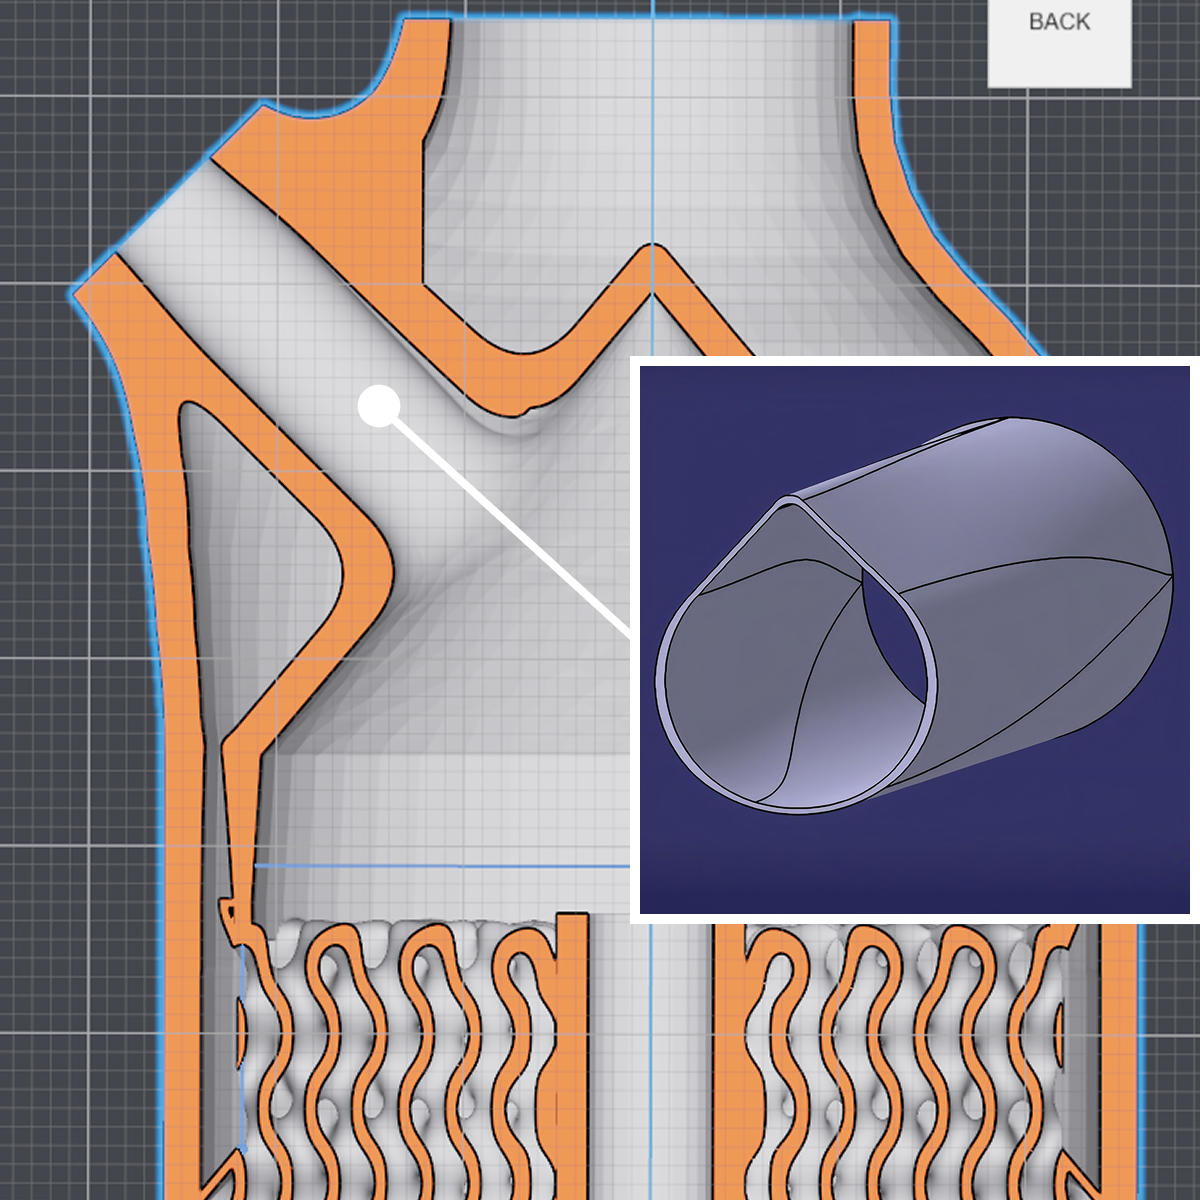
If the inlet pipe keeps a circular cross-section, its top surface becomes a large overhang. To reduce this, we changed it to a teardrop shape with a pointed top.
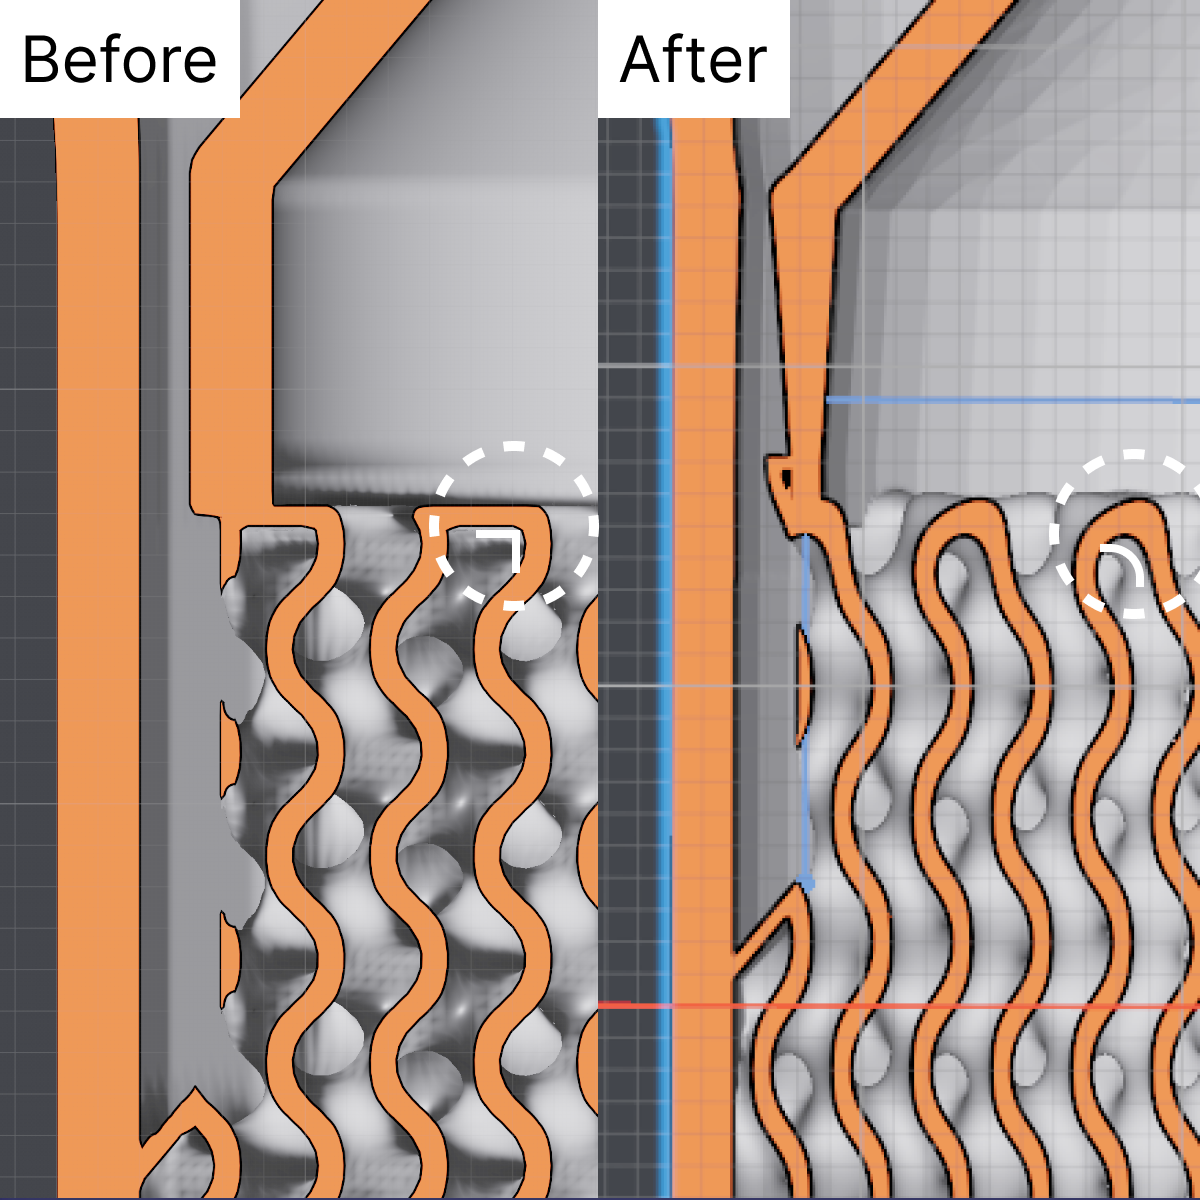
Rounding the Gyroid-to-Ceiling Connection
When the gyroid meets the ceiling at a sharp angle, that area becomes an overhang. To eliminate the gyroid overhangs, we rounded the corners where it connects to the ceiling.
Controlling Wall Thickness
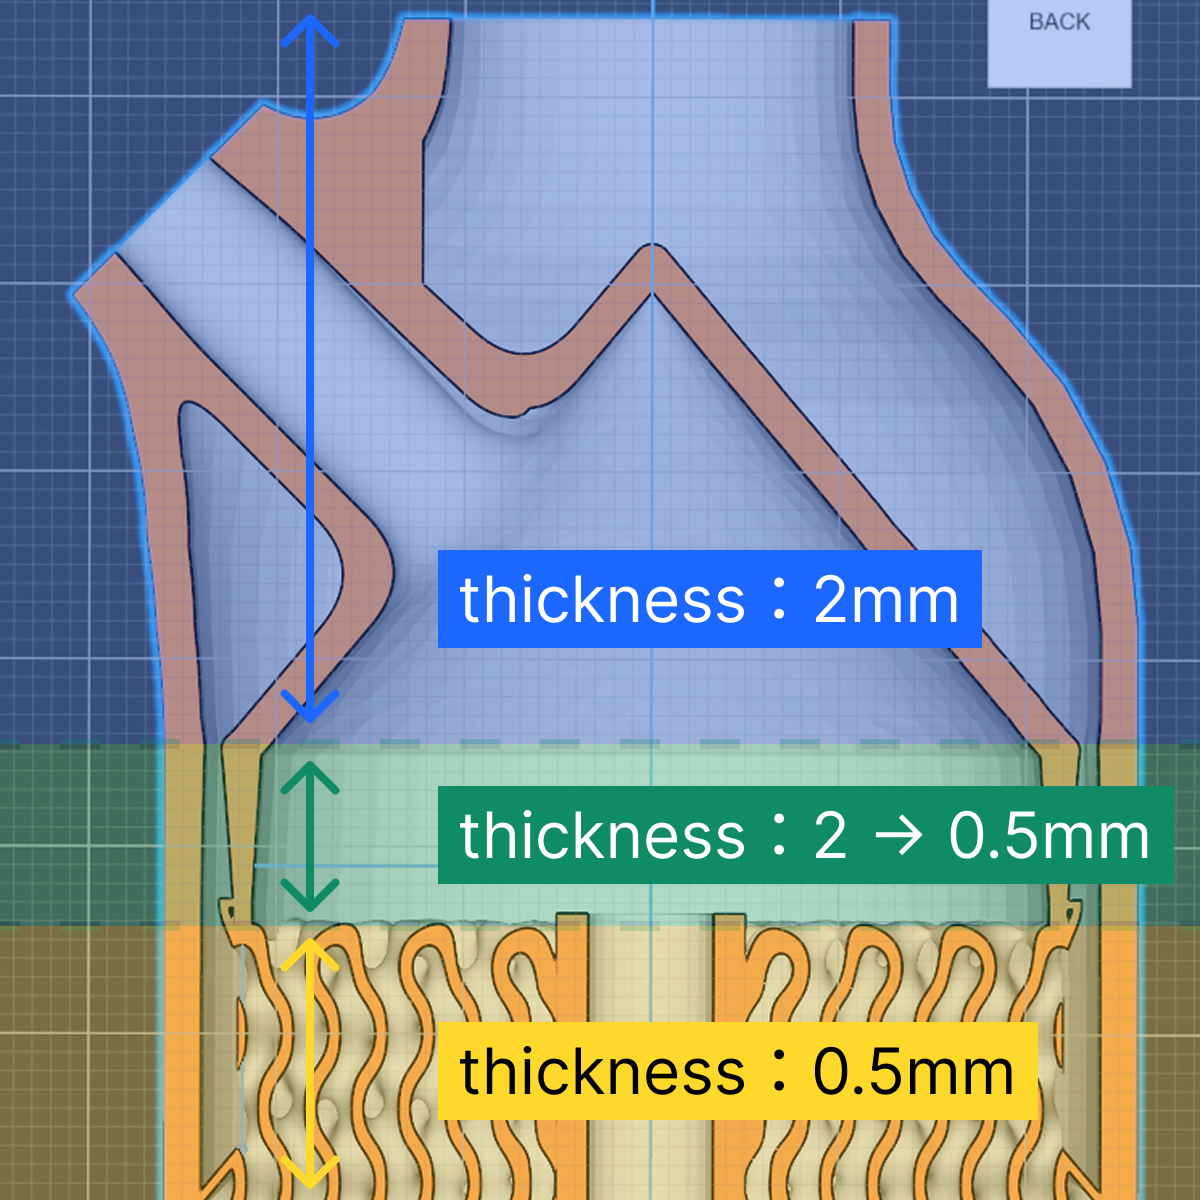
Within the Inner shape, the walls above the cone are thick (2mm), while the walls below are about 0.5mm thick. The heat exchange section is kept thin and the rest is kept thick, with an Implicit Ramp in between so the thickness changes continuously.
Avoiding Dead Ends
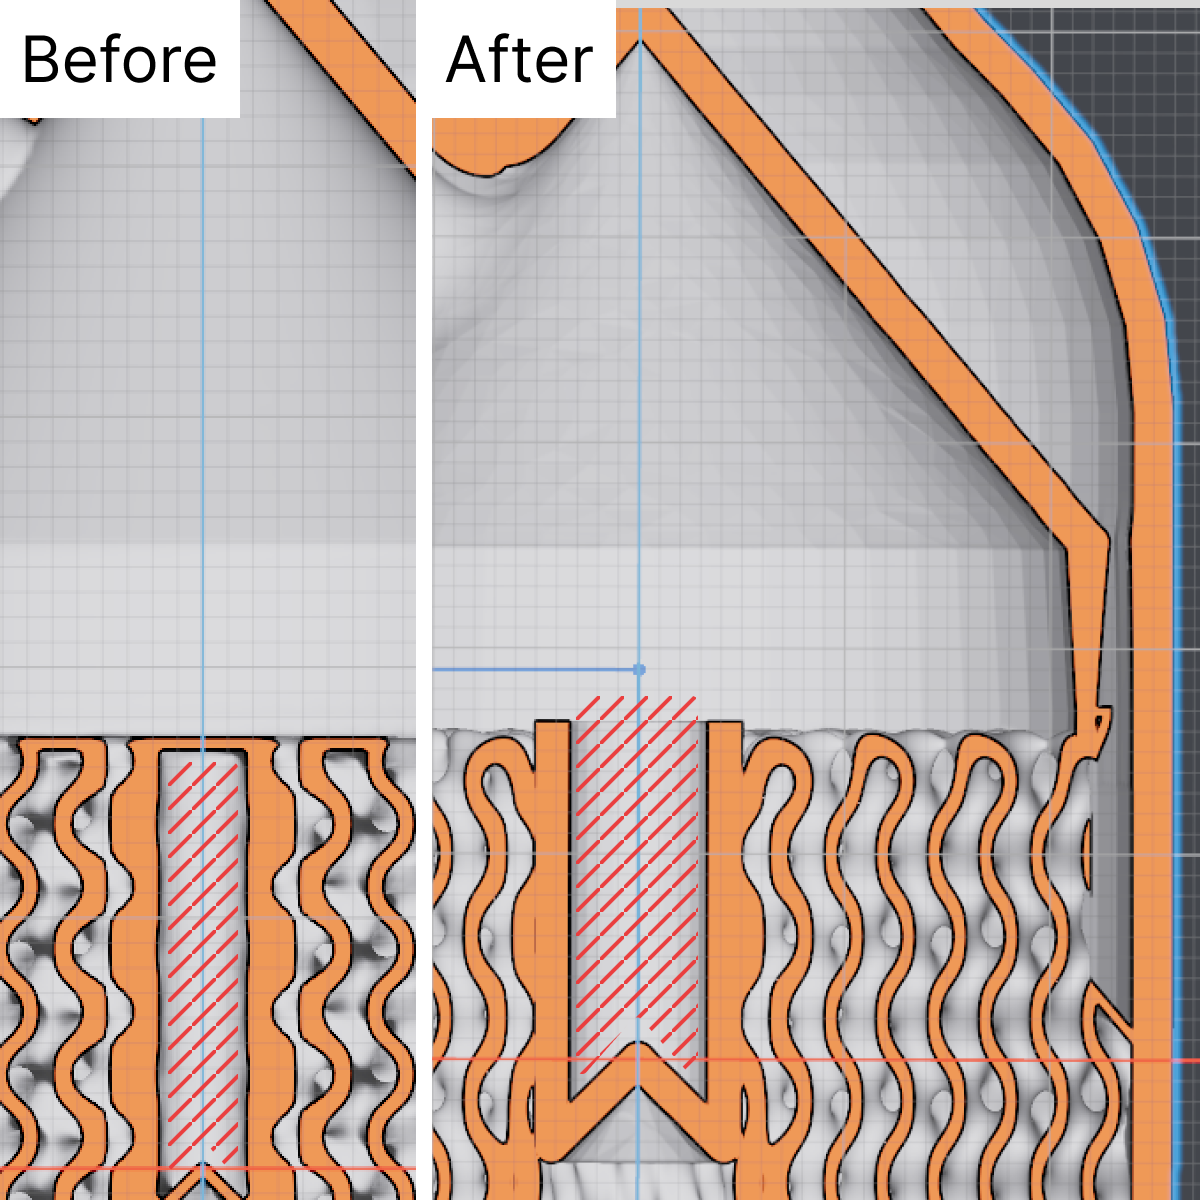
If you create a fully enclosed space, the powder inside can’t be removed after printing. In this design, the inside of the central tube (red hatched area) was an enclosed space, so we opened its end to give the powder a way out.
Hello Island
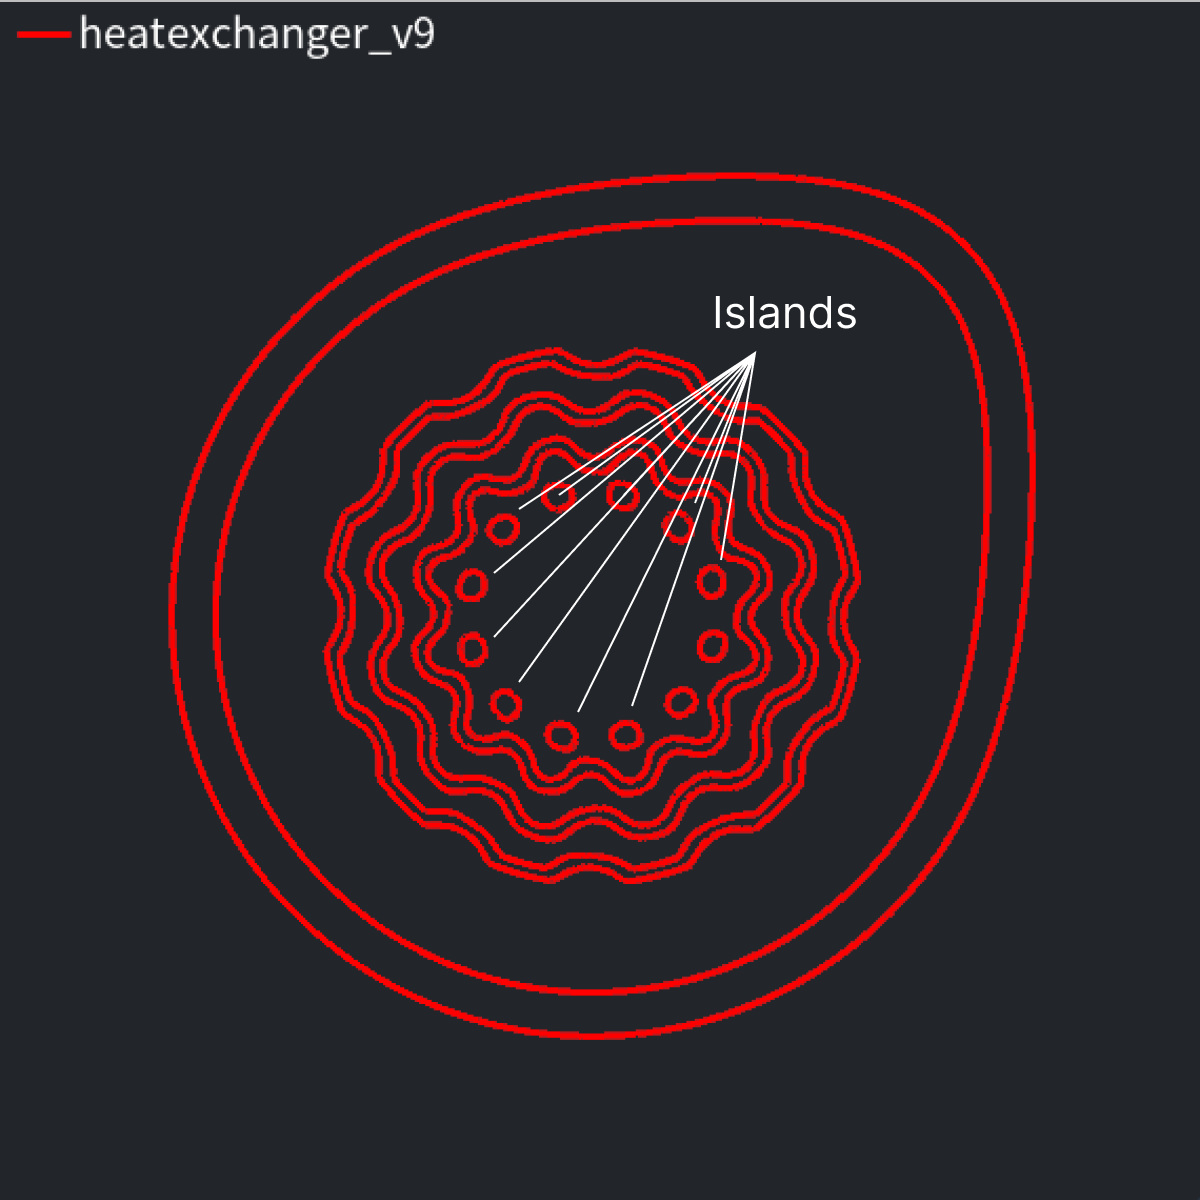
One last problem: building the gyroid downward creates isolated islands. When a printed region suddenly appears with nothing beneath it, it can scatter powder or roughen the surface. To fix this, the gyroid’s undulation needs to be reduced.
Conclusion
In this article, we showed how we built a heat exchanger from scratch in Nodi.
Nodi works on everything from CAD/CAE software packages for design to engineering services specialized for specific manufacturing processes, starting with additive manufacturing as shown here.
If you’re interested, please feel free to get in touch.